Instructional Design Clinic
Transcript of the clinic topics presented at ELearnExpo Paris 2004
1. Overview
Conference sessions are usually a one way affair … the presenter speaks, you listen.
But this novel ‘Clinic’ session provides practical guidance across a wide range of Instructional Design topics with full delegate participation. Working within a broad framework, Tim Neill first explains and illustrates each concept before inviting individual queries or concerns from the audience. He suggests solutions and suitable approaches, and then demonstrates these wherever possible using dynamic working examples.
Since no-one knows what issues might be raised on the day, there can be no prepared script – a truly interactive session! But the framework for the Clinic will cover the following topics and these notes are intended as an aide memoir.
2. What makes great e-Learning?
There are two ways to think of e-Learning. From the organisation’s point of view, the success of an e-Learning project is measured in terms such as the return on investment it receives, the speed with which staff can be trained and the effectiveness of that training.
But from an employee’s perspective, how good an e-Learning program really is depends on some very different criteria. The learner must feel that the program is relevant to their job, that it sets clear, achievable objectives and that it provides opportunities for them to demonstrate that they have achieved them. While they are learning, guidance and assistance should be easily available at all times. An excellent metaphor to consider is that e-Learning should behave like an infinitely patient expert at your shoulder.
Learners expect any program to be stylish, very easy to use (even occasionally) and for its content to be accurate and intelligently presented. Different people learn in different ways so a good program will provide its information in a form which suits the user at that moment.
Finally – and perhaps most importantly – the e-Learning experience should be fun and engaging! If you can deliver e-Learning programs which your learners voluntarily repeat because they enjoyed it or want to do better, then you will have succeeded.
3. Planning
The first step for any e-Learning project is to define the objectives for the organisation. What is it that you want to achieve and how will you determine if you have been successful? For example, you may wish to reduce a five day residential induction programme to three days, cutting external costs significantly. You may decide that new employees could first acquire all the fundamental knowledge they need via an e-Learning program studied at their place of work, before joining others in an interactive workshop. This would have the additional benefit of ensuring that all new employees arrive at the training centre equipped with the same level of understanding.
The next step is to carry out a learning needs analysis to identify those aspects which can be taught with e-Learning and those which will take still place in a classroom.
It is a common mistake to overlook the need to precisely define the learning objectives for the program. Many people assume that all they need to do is to convert existing training material into an electronic form and send it over their intranet. This usually ends up producing dull, tedious programs with little focus. Defining learning objectives for an e-Learning program is very different than doing this for face to face training. A learning objective of “be able to understand the origins of the company” poses no problem for a classroom tutor who can easily make an assessment of understanding by questioning the employee. In an e-Learning program, to “understand” is not a measurable objective.
The learning objectives must be built on relevant, unambiguous and measurable tests. For example, instead of “understanding” the origins of the company the learner will perhaps be able to “identify the four major events in the history of the company”. This type of objective and its achievement are simple to program. Other similar types of learning objective might include:
- Match appropriate pension products to our customers’ needs
- Recognise the five most common symptoms of gearbox failure
- Identify the six key regions for sales growth in 2005
- Select the correct sequence of actions for dealing with an acid spillage
These learning objectives serve two crucial roles. When planning the program they provide the backbone on which all content is designed and built. At every stage the instructional designer should be asking himself/herself “what do I need to do to fully equip the learner to achieve this objective?”. If video clips, animations or extra text have no useful role to play (other than filling out the program) than they do not deserve to be in the program.
The learning objectives should also drive the design of the final test, whose successful completion signals that the learner has indeed achieved competence.
4. Research and Documentation
The research phase will identify and capture the subject matter material which needs to go into the program and a ”scope” document will be produced. This document defines the content and structure of the program and will serve as a route map for design. Subject matter experts will be interviewed, their advice, knowledge and source material captured.
This is where the real instructional design begins. For each learning objective the instructional designer must conceive an interactive experience which leads the learner through the necessary material for them to achieve competence. Again, it is a common mistake to include existing material such as videos or photos simply because they are already available. It may be cheaper but is almost certainly not as effective as new, purpose-built content.
A program which leads the learner along a path of discovery, with opportunities for practice with helpful feedback and supporting explanations, usually results in deeper learning.
The whole design must be produced in the form of a storyboard, describing exactly what will happen on each screen, what the learner is required to do at each step and the detailed script for any voiceover narration. The various stakeholders will review the storyboards, make comments and changes and finally sign them off.
5. Interface design
‘Look and Feel’
The first impression of the program is crucial. It must be stylish and inviting and should echo the corporate style and branding of the organisation. Many e-Learning programs appear to have been created by people with little feel for graphical design and end up being nothing more than a collection of dull web pages. This is no way to excite your learners!
To avoid a feeling of ‘sameness’ in a large program, it’s a good idea to ‘theme’ each section with different colours and imagery. A plain white “stage” works best for most content … text in a dark colour is easier to read, images stand out clearly especially if treated with a drop shadow and the overall impression is clean and uncluttered.
Navigation, menus and other user controls
When a learner is faced with a new program their first reaction is probably “How do I drive this thing?”. Since the material will probably be organised into pages, topics and sections we need to provide an easily understood method of moving around.
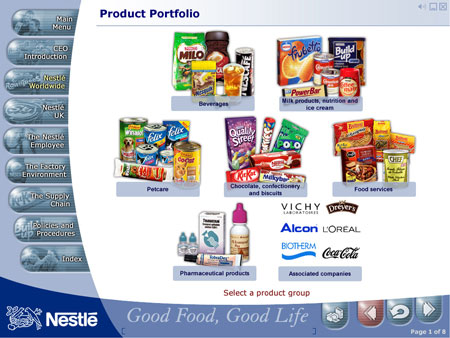
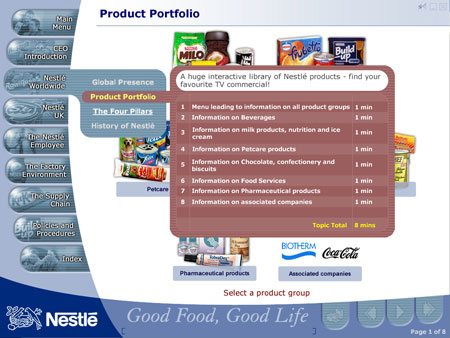
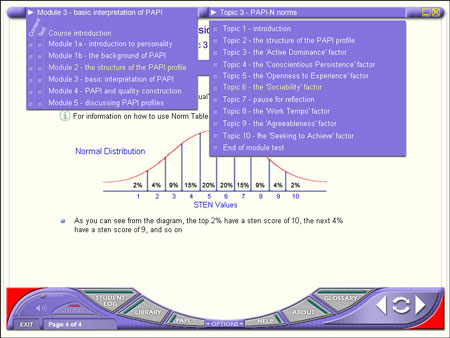
A Menu must be no more than a single click away, wherever they are in the program, and should give direct access to any topic. This is the equivalent of referring to the ‘Contents’ section of a book. If the program is also to serve as a reference source then the menu should also offer navigation down to a specific page. See Figures 1-4 below.
Permanent Menus can occupy a significant amount of screen space and if this is unacceptable then a button labelled ‘Menu’ is a practical alternative: one click and the menu graphics appear.
Keep in mind that the learner will be unfamiliar with your particular navigation controls and can become frustrated very quickly if they don’t behave for them as they expect. For example, automatically revealing menu graphics whenever the cursor is moved over the Menu button may seem to the designer to be making the program easy to use but can become infuriating if it keeps happening unintentionally.
On the other hand, it is perfectly reasonable for the program to automatically remove the menu graphics when the learner moves the cursor away from them because they are signalling that they do not wish to click on a menu option.

Once the learner has chosen a section and a topic they need a simple means of controlling how they move through the material. Navigation buttons must be provided to:
- Move to the next step or next bullet within the current screen. This can happen under program control but it may be safer to let the learner decide when they are ready to move forward. It all depends on the type of content. For example if the screen is simply a sequential explanation of a process, supported by a voiceover, it is probably more enjoyable for the learner if the program reveals all material automatically without the need to continually keep clicking. However if the material requires some thought at each step during the screen build-up, the program should leave the learner to decide when to move to the next point.
- Repeat (re-enter) the current screen. Many e-Learning programs omit this useful control, forcing the learner to go back one page and then forward again in order to re-enter the current page.
- Pause the audio, video or animation that is currently playing
- Move on to the next page
- Move back to the previous page
In addition you may need to provide special-purpose controls for video and animations such as play, pause, stop and rewind. There should be a brief explanation of all the user interface controls, accessible at any time.
Use of icons
Be very careful not to confuse your learners with graphical icons. We have come to recognise and accept the popular icons used by Windows applications such as Word, Excel and PowerPoint because we use them every day. But an e-Learning program may only ever be used once or twice and although your designers may be proud of the stylish set of graphical symbols they have created over many months they may mean nothing to the one time user.
There are a few icons which will be generally recognised and are usually safe to use in e-Learning programs. These include symbols such as: Exit, Minimise, Information, Help and Glossary. See Figures 5 and 6 below. Note that the icons also carry a text label to assist the user.
6. Program structure
Planning for expert and novice learners
Keep in mind the possible differences in knowledge and experience between your learners. Each person will start the training program with a unique initial competence, some requiring very little study, others needing a great deal of help.
An e-Learning program which takes this probability into account is bound to be more acceptable and cause the least frustration to the widest possible audience. So do include optional background material – or links to this material – which may be needed by some learners but not by others.
Competence-driven content
It is reasonable to ask whether, if a learner is already capable of proving their competence without working through the program, should they be forced to do so? Why not invite learners to take the competence test at the beginning of the program?
This is an interesting approach and one which is frequently overlooked. There is no reason why the answers given by a learner in an initial competence test cannot be used to automatically build a personalised training program. This method respects the differing levels of competence between learners and will impose the minimum study time required for each person. All learners of course should still be required to pass a competence test to complete the program.
There are some areas in which this technique would not be acceptable, particularly in those businesses which must be able to prove that their staff have been exposed to every aspect of a subject, such as compliance training in selling financial services.
Drilling for information (satisfying differing needs/interests)
Try to keep the program interface uncluttered by information which is not essential for understanding the key concepts currently on screen. One of the problems of working with subject matter experts is that they usually have difficulty in structuring the vast knowledge they possess into layers of increasing size and complexity. After all, they are experts and they carry around all of this information in their heads!
This is an important task for the instructional designer, to be able to stand back and organise a vast body of information into the essential details at the top level, a few paragraphs of interesting additional facts one level down and finally any detailed further reference (which could include text, videos, animations, interviews etc) at the deepest level.
The golden rule when designing the ‘layering’ of information is that all material necessary to achieve competence in the learning objectives must be held on the top layer. All other layers are optional and therefore you cannot be certain that all learners have seen all material. It would be unfair to pose a question in the competence test which had assumed that the learner had read an optional background article.
7. Content Creation Text
Reading text explanations on a computer screen is probably the most boring punishment you could inflict on your learners. Obviously some text is essential but you should be trying to keep text at the top level (that is, the core information needed to achieve competence) to the very minimum.
If the program has no audio narration then your text will need to be enjoyable to read. The best combination however is to rely on the audio narration to explain the material while the on-screen text is presented in the form of simple “bullet” phrases. The imagery, narration and key text phrases should combine to produce a memorable impact. Consider the technique used for television news items and documentaries, where very little text is used on screen while presenting or explaining quite complex factual information. The human brain is extremely adept at assimilating these different inputs all at the same time!
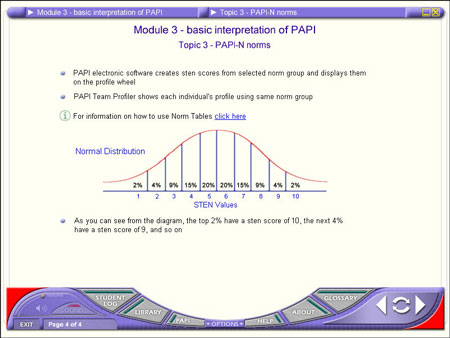
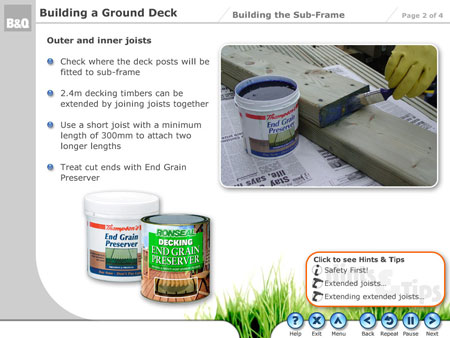
Where more detailed explanations are required then provide the learner with a second level of information. Figure 7 below shows the top level of an e-Learning program in which an audio narration
is running. This is quite enough text for one screen. Figure 8 shows how further text information is called up in a panel using the ‘Hints & Tips’ button.

The size, style and colour of text all have a bearing on the perceived quality of the finished program. It seems incredible that in spite of hundreds of years of evolution in the printing industry, resulting in today’s top-quality brochures, magazines and other publications, e-Learning programs are still being produced which manage to break all the established rules of style, consistency and legibility.
On-screen text should use a single, low key colour such as dark blue or charcoal. A sans serif font such as Arial or Gill Sans in no smaller than 12 point is ideal. Avoid using italicised, underlined or bold styles because these will all distract the learner.
If the program is for use on systems with and without sound, you should also provide an optional full transcript of the voiceover for each screen, displayed in a text panel.
The clinic also discussed the issue of easily maintaining on-screen text by keeping it in external files. This technique enables an unlimited number of different language versions to be supported by a single copy of the program. The same rules of style and layout apply, with the additional concern to make sure that the text being read from a file is not too long to fit in the space you have allowed on screen! The layout may look perfect in English but in German or Portuguese that extra 60% of text for the same sentence may run off the bottom of the screen …
Images
The imagery you include to support the learning may include photographs, diagrams, cartoons and other illustrations. The clinic looked at examples of all of these types of images and highlighted common errors. The most common mistake is to use a mixture of images, simply because they are available. Photos, clip art, custom-drawn cartoons, etc may look good in isolation but when combined can look clumsy and tasteless. Try to establish a single style of imagery and keep to it throughout the program.
Image formats
There are many different image formats, each with its attractions and drawbacks. They include:


PNG - this image format makes use of something called the “Alpha” channel, an additional level of graphical information controlling the way in which an image is processed and displayed. By saving an image as a .PNG file, the transparency attributes of the image are preserved. This means that you are not restricted to a rectangular image shape and can include very stylish imagery with effects such as realistic drop shadows. Images may also overlap one another, as if the image on top had been cut out with scissors.
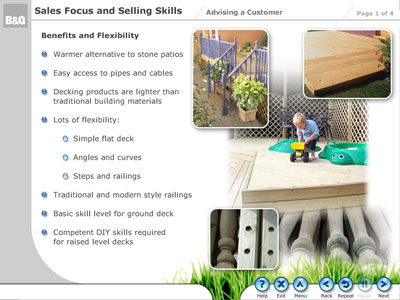
Note in Figure 13 below how the smoothly radiused corners of the individual photos reveal the image behind the curved edges. At the bottom of the image also notice how the grass and wooden posts are merged subtly by their transparency. The drop shadows are also slightly transparent, adding to the realism.
Photographs - can be very cost-effective if taken specifically for a project. Photos of staff may have a short shelf life if people move on. Always take digital photos at a higher resolution than you need. An image of 2000 x 1500 pixels will preserve sufficient detail to allow you to edit it using Photoshop before saving it at its final size of perhaps 400 x 300. An even larger original image of 3200 x 2400 pixels will give you the freedom to zoom in and select specific areas as individual images, with no loss of final quality.
Stock photographs can be an expensive solution (typically £50 to £100 per image) but are guaranteed to be of a high quality and with so many now available on line it is likely that the desired subjects already exist. Always remember the laws of copyright, especially when surfing the Internet …
Diagrams
Programs such as Macromedia Flash are ideal for creating custom diagrams which illustrate and explain processes, procedures, organisation charts, etc. Even better if you bring them alive with animation, provided the treatment adds to the learner’s understanding and is not just for effect.
Cartoons
Cartoons do have their place since humour can be a great vehicle to assist learning. But do be careful to preserve the style of the program (don’t cheapen it) and keep the content in good taste. (See the section on hand-drawn illustrations below)
Clip art
Why is it that clip art always looks like … well, clip art? Personally, I think there is something rather cheap and lazy about using clip art images in e-Learning content. Whenever I see clip art I think of a hastily prepared PowerPoint presentation rather than a well-planned, quality training program and your learners may well feel this too. So leave clip art where it belongs -on the free magazine CD.
One of the most effective techniques for creating interesting and special purpose illustrations is to use a traditional artist. There is something about hand-drawn illustrations, produced specifically for the project, that give a real warmth to a design.
The technique is very straightforward and starts by finding a really good artist, someone with great imagination who can work on paper in watercolour or acrylic. You brainstorm your ideas with the artist to agree a set of illustrations to exactly support the learning content. The artist produces the illustrations on paper at typically A4 size and you simply scan these to produce your source images. These images are then edited in Photoshop to adjust their size, to add colour if they were produced in monochrome and to add special effects such as a drop shadow.
Beware the distracting use of transition effects. In the early days of film making, the producer couldn’t resist using fancy transitions between scenes … scrolling paper, diagonal wipes, wavy zigzags, moving in and out of focus accompanied by a harp, and worse.
If you are going to use any transitions at all between images, keep to a clean and consistent style, perhaps just a smooth cross-fade. Beware checkerboards, barn doors and the rest of those heavy-handed and unnecessary effects.
Audio
A narrated program is far more effective and enjoyable, allowing the learner to absorb information in different ways from the visual content. By explaining to the learner with a professional voiceover, you can dramatically reduce the need for so much text on screen.
Avoid using sound effects unless they genuinely contribute to the impact of the material. For example, an animation of a piece of machinery would come alive with the addition of a squealing drive belt or a hissing pressure relief valve. But simply to add gratuitous noises whenever a menu panel appears or the learner answers a question correctly quickly becomes irritating.
Audio files should be kept externally to the program, enabling temporary versions to be used during development and then easily replaced with the professional version before final testing and acceptance. The same argument applies to external audio files as it does to external text files: they remain readily accessible for future editing and make the addition of other language versions extremely straightforward and requiring no re-programming.
Nowadays audio recordings can be heavily compressed to create extremely small files without significant degradation in quality. This makes e-Learning with audio a viable option for relatively low bandwidth delivery. During the clinic, different degrees of audio compression were demonstrated. The most popular formats are .wav (large files with no compression), .mp3 and .wma (small files).
A particularly effective use of audio is in providing the learner with a ‘virtual interview’. This is how it works: you prepare and pose a list of questions to a particular person whose opinion or knowledge is required during the program. You then offer the text of each of these questions to the learner and when they choose a question, you play the audio answer given by the expert. The benefit of this approach is that the learner is not forced to listen to a long, linear interview, waiting for topics of interest to be discussed. Instead they choose only those topics which interest them and in the order they prefer, leaving them feeling in control of their learning.
Audio narration must be synchronised to play with the relevant screen content. Since the learner may be distracted and miss some of the explanation, the Repeat button should restart that audio clip or reenter the whole screen. The pace of the audio should not be too fast, after all the program is not a TV commercial selling a product!
Video
Video clips produce huge files, typically 7Mb – 10Mb per minute for reasonable quality. This means they are unsuitable for low bandwidth delivery. Video is ideal for personal addresses by experts or senior management and for “virtual interviews” in the same way as previously described under “audio”.
If the subject material already exists in the real world, shooting video sequences is usually far more cost-effective than creating animations. For example, demonstrating the correct method of carrying out a procedure such as assembling a component or administering first aid.
For low bandwidth delivery where some form of video is essential, you might consider producing “pseudo video”. This involves first shooting a video clip in the normal way (25 frames per second in PAL) and then editing the clip to remove at least 90% of the frames, leaving only those frames that depict the most important action. Surprisingly, the resulting animated video -although jerky -is still highly effective in communicating the key stages in a process and far more cheaply than trying to create a custom animation.
The most popular format for video is MPEG which provides control over the final quality, frame rate and image size, all of which have an impact on the final file size. Adobe Premiere is the best desktop, non-linear video editing program and is highly recommended.
2D Animation
The clinic also demonstrated examples of 2D animation, created using Macromedia Flash. Adding movement to otherwise static content is an economical way to add a little spice, provided the effects do not detract from the learning. For example, animating a new topic title onto the screen, holding it for a second and then moving it off screen.
Animation is the only way to illustrate and explain the dynamics of any process which is invisible, such as the movement of funds between financial systems or the action of a drug on the body. Used sensibly, animation can add great interest and clarity to an otherwise complex topic. Used carelessly (clapping hands on completion of a quiz, a hand waving goodbye on leaving the program) it will trivialise the subject matter.
It is a good idea to provide the learner with simple controls over the animation, allowing them to pause or restart the sequence. There are many development tools for creating 2D animations, the most widely accepted being Macromedia Flash. This is an outstanding program providing all the controls and effects you could ever wish for, including the addition of synchronised sound.
3D Modelling
Several examples of 3D modelling were shown and discussed, all created using a system called LightWave. 3D modelling is a highly specialised skill and one which requires very special talents.
3D allows the instructional designer to create artificial worlds that would be impossible or too expensive to video or build. These worlds may form an interactive environment in which the learner navigates around or they may provide a dynamic “fly-through”. It also allows the creation of product models even before they have been manufactured.
360 degree worlds
There is another technique available to the instructional designer wishing to provide the learner with an interactive environment of the real world – photographic 360 degree imagery.

- Multiple panoramic images -a series of individual digital photos are taken with the camera mounted on a tripod, each image overlapping its predecessor. The resulting sequence of photos is then “stitched” together using an application such as ‘VRWorx’ or ‘Panorama Maker’ to form a single panorama image, usually in JPEG format. This image can then be incorporated into an interactive sequence within Flash, possibly with hotspots and other interactions. No special lenses are required but the drawbacks of multiple exposures can be significant: if people or equipment are moving while you are taking the pictures (which may take several minutes) there may be amusing inconsistencies between frames … also, great care is needed to ensure consistent exposure and alignment between frames.
- Single 360 exposure - if you fit a special 360 degree lens to a digital camera then it is possible to take a single exposure which captures everything around you. This means there are no inconsistencies and no matter what movement or action is taking place, it is all captured in the same instant. The resulting circular image is then “unwrapped” by a utility program to produce a long, narrow panorama in JPEG format.
These images can be used directly in Flash or, as an alternative, used to create an alternative viewing format known as a QuickTimeVR movie (.MOV). These movies require the Apple QuickTime player to be installed on the learner’s system. Both techniques were demonstrated during the clinic. Multiple 360 degree worlds can be linked together with hotspots so that the learner can move between them.
Interactive exercises
All of the topics discussed so far are no more than “technologies”, simply different ingredients of the e-Learning cake, available to the instructional designer. Technologies alone will not create enjoyable and engaging e-Learning. What is needed is the imagination to draw together these ingredients to form interactive content whose study and completion enable the learner to achieve the learning objectives.
The traditional approach to learning consists of introducing information, facts and concepts to the learner and expecting them to absorb this material before later proving they can remember it. No wonder that the learning objectives for such a narrow approach can hope to do no more than test that they can “identify”, “match”, “select” and so on. These are simply tests of knowledge, not judgement or competence.
Of course, the development of true employee competence only happens in the workplace but there is no reason why the e-Learning program should not be designed to also encourage the development of judgement. If we accept that the ideal e-Learning environment should provide each learner with the unique support and guidance they need at each stage (“the expert at their shoulder, always ready to help”) then the instructional design can afford to be far more ambitious in the way it works.
The key to designing successful interactive exercises is to think not in terms of imparting knowledge but of providing task-related practice and of course these relate directly to the learning objectives agreed at the outset. So, if a learning objective was to “be able to correctly select the most appropriate investment fund for eight out of ten prospective clients” then the interactive exercise could be built around “virtual interviews” with these clients, in which the learner may probe their requirements, listen to their responses and make their decisions.
During the exercise, the learner should be able to refer to any reference material they might need as well as other guidance, and if they get stuck to receive constructive help. The examples shown during the clinic included:
- Interactive mechanical assembly, with successive assistance
- Interactive electronic circuit, requiring a working knowledge of Ohm’s Law, circuit resistance calculations and resistor colour codes.
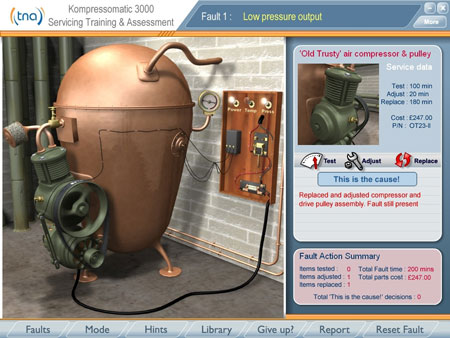
- Kompressomatic 3000 equipment servicing simulation, with animated components, a range of faults each with its symptoms and immediate access to service manuals and procedures if required
These exercises can be presented in several ways. As an interactive environment (ie: as a “safe” practice area) the learner can explore, try out solutions, ask for assistance and generally become comfortable and confident in performing the tasks. If they understand that they are not being measured and their actions are not being recorded then they will relax and enjoy the experience.
The same exercise can also be used as a more formal assessment of competence. Once the learner feels ready, he or she elects to complete a measured exercise, without the interactive assistance provided during the practice session. Any aspect of their performance can be tracked and recorded including total time taken, number of times they used reference material, which questions they asked in virtual interviews, and so on. The insight this provides into learner competence far exceeds anything that is possible using traditional quiz questions.
8. Tracking Learner progress
There is no limit to the range and complexity of information which may be tracked and recorded for each learner. The Kompressomatic 3000 exercise described above could provide a comprehensive log of every action taken by the learner, organised in a database or spreadsheet to enable immediate comparison against a benchmark or peer group.
For a task-related exercise the algorithm used to assess whether or not competence has been reached might combine factors such as the total time taken, the number of times the reference manual was accessed, the number of times a witness was interviewed, the quantity and cost of components used in isolating the fault, etc.
For example, “competence” may be considered to have been achieved if the learner identifies a fault within 30 minutes elapsed job time, at a maximum total cost of £40 and with no more than three visits to the service manual. Consider how much more insight this data provides into the effectiveness of training and assessment compared with a traditional multi-choice quiz.